A couple of fellow pentagon knitters posted arresting images.
Monica over at Bridget's Brei Blog posted a picture of a pat of butter. I have often admired the ripples that forms in butter when you pull a knife edge along the top, when the butter is at just the right temperature. But, in this hurry up world, I never stopped to take a picture of the "butterwing" like Monica. Beauty is all around us, I tell ya.
Cristiana of Knitaly posted some breathtaking photos of her Swirled Pentagon Pullover. I especially like Flower Power and Mi sento un po' pitagorica. (If the photo in the latter post does not show up initially, click on the empty photo box which links to the full-size image.) Cristiana stopped to admire her knitting and realized that she had a five-pointed star!
Links:
Reflections on Time
Intense Seeing
My Pentagons
Showing posts with label Pentagon. Show all posts
Showing posts with label Pentagon. Show all posts
Wednesday, July 25, 2007

Sunday, February 04, 2007
The Join of Pentagons
Gaia asked how I achieved an invisible join between the Capecho pentagons. I promised to explain. (I am only making an abbreviated circle of six pentagons instead of the entire shrug so you will need to tweak these modifications for your project.)
Look at the schematic below. The pentagons are numbered in the order I plan to knit them. Number six will join five and one to complete the circle. The black and blue lines look very similar in the thumbnail below; click on the image to see the true colors. On one needle (black lines), I cast on 12*28 stitches using a long-tail cast-on (LT CO). On another needle (blue lines), I LT CO 6*28 stitches. On double pointed needles (red lines), I used a provisional crochet cast-on for 28 stitches 6 times. I learned the technique from Lucy Neatby's Spun Yarn Newsletter #13.
I've been very busy lately so the only picture I took of the process is spread out over two chairs in my immunologist's waiting room. I am starting pentagon #5. I will pick out the crochet chain on pentagon #4, place those stitches on a needle, and knit (or purl) those 28 stitches, knit 2*28 stitches off the bamboo needle (black lines in schematic), knit 28 provisional crochet stitches off the double-pointed needle (red lines), and then 28 stitches off the green needle (blue line).
 Remember when I obsessed over needle sizes to get the desired pentagon size? I needed to begin on row 5 of the Capecho chart so that the cables flowed smoothly between pentagons. If I started on another row, I would have had to adjust the cabling maneuver rows. That's not too difficult if you are knitting your pentagons in the round as I am.
I am not entirely happy with this technique. The LT CO stitches stretch between pentagons and the trailing multiple needles are a pain.
Earlier, I tried using a long-tail cast-on for 2 sides, then knitting a crochet cast-on by alternating between the two yarn ends, then LT casting on for another side, dropping the short tail and then knitting up the last crochet cast on. If this sounds confusing, that is because it is.
Anyway, that attempt was fine until I got to the neighboring pentagon and tried to pick up the provisional stitches. All those extra loops from the two yarn tails were a nightmare. I gave up and decided to cast-on all outer edge stitches at once.
There were several other frustrations. When picking up the provisional loops in ribbing, the crochet chain does not come out cleanly. Furthermore, there is a half-stitch jog at the joins if you look closely.
If only I had read cmeknit's grafting in rib tutorial earlier! She doesn't seem to have a half-stitch discontinuity at the join. (Update: I posted my own pictorial tutorial for grafting in rib pattern.)
Design your own knitted pentagon
You can knit a regular pentagon in any stitch pattern as long as you know your row and stitch gauge. Take a look at Wolfram Mathworld's pentagon page. Do you see the regular pentagon with labels R (circumradius), r (inradius), and a/2 (side)? Decide your side length and multiply that by your stitch gauge for the number of stitches to cast-on per side; let's call that number n. (Read Sizing Knitted Pentagons for help.) You want to cast on 5*n stitches and reduce stitches until you end up with 5 or 10 stitches at the center of the pentagon.
Calculate the length of your inradius, or the little r in the Wolfram pentagon schematic. Type sqrt(25+10*sqrt(5))/10 into your Google search bar and you see that r = 0.688*a. Multiply r by your row gauge to find out how many rows (call this RC, your row count) you need to knit till you reach the center of your pentagon.
If you start with n stitches and need to decrease to 2 stitches, then you need to decrease once every (n-2)/RC rows.
Suppose you want to knit a stockinette pentagon with 3 inch sides with a 5x7 gauge. You need to cast on 15 stitches and decrease over 14.5 rows. Let's round it to 14 rows. That means you decrease at the beginning (or end) of each side on every row for 14 rows. Then cut off your yarn with a longish tail, thread it through a needle and draw it through your remaining loops twice to tighten up your hole. Weave in the end. That's all there is to it.
Don't be afraid of the math. Just cast-on and play. It's only knitting and yarn is very forgiving.
Look at the schematic below. The pentagons are numbered in the order I plan to knit them. Number six will join five and one to complete the circle. The black and blue lines look very similar in the thumbnail below; click on the image to see the true colors.
 On one needle (black lines), I cast on 12*28 stitches using a long-tail cast-on (LT CO). On another needle (blue lines), I LT CO 6*28 stitches. On double pointed needles (red lines), I used a provisional crochet cast-on for 28 stitches 6 times. I learned the technique from Lucy Neatby's Spun Yarn Newsletter #13.
I've been very busy lately so the only picture I took of the process is spread out over two chairs in my immunologist's waiting room. I am starting pentagon #5. I will pick out the crochet chain on pentagon #4, place those stitches on a needle, and knit (or purl) those 28 stitches, knit 2*28 stitches off the bamboo needle (black lines in schematic), knit 28 provisional crochet stitches off the double-pointed needle (red lines), and then 28 stitches off the green needle (blue line).
 Remember when I obsessed over needle sizes to get the desired pentagon size? I needed to begin on row 5 of the Capecho chart so that the cables flowed smoothly between pentagons. If I started on another row, I would have had to adjust the cabling maneuver rows. That's not too difficult if you are knitting your pentagons in the round as I am.
I am not entirely happy with this technique. The LT CO stitches stretch between pentagons and the trailing multiple needles are a pain.
Earlier, I tried using a long-tail cast-on for 2 sides, then knitting a crochet cast-on by alternating between the two yarn ends, then LT casting on for another side, dropping the short tail and then knitting up the last crochet cast on. If this sounds confusing, that is because it is.
Anyway, that attempt was fine until I got to the neighboring pentagon and tried to pick up the provisional stitches. All those extra loops from the two yarn tails were a nightmare. I gave up and decided to cast-on all outer edge stitches at once.
There were several other frustrations. When picking up the provisional loops in ribbing, the crochet chain does not come out cleanly. Furthermore, there is a half-stitch jog at the joins if you look closely.
If only I had read cmeknit's grafting in rib tutorial earlier! She doesn't seem to have a half-stitch discontinuity at the join. (Update: I posted my own pictorial tutorial for grafting in rib pattern.)
Design your own knitted pentagon
You can knit a regular pentagon in any stitch pattern as long as you know your row and stitch gauge. Take a look at Wolfram Mathworld's pentagon page. Do you see the regular pentagon with labels R (circumradius), r (inradius), and a/2 (side)? Decide your side length and multiply that by your stitch gauge for the number of stitches to cast-on per side; let's call that number n. (Read Sizing Knitted Pentagons for help.) You want to cast on 5*n stitches and reduce stitches until you end up with 5 or 10 stitches at the center of the pentagon.
Calculate the length of your inradius, or the little r in the Wolfram pentagon schematic. Type sqrt(25+10*sqrt(5))/10 into your Google search bar and you see that r = 0.688*a. Multiply r by your row gauge to find out how many rows (call this RC, your row count) you need to knit till you reach the center of your pentagon.
If you start with n stitches and need to decrease to 2 stitches, then you need to decrease once every (n-2)/RC rows.
Suppose you want to knit a stockinette pentagon with 3 inch sides with a 5x7 gauge. You need to cast on 15 stitches and decrease over 14.5 rows. Let's round it to 14 rows. That means you decrease at the beginning (or end) of each side on every row for 14 rows. Then cut off your yarn with a longish tail, thread it through a needle and draw it through your remaining loops twice to tighten up your hole. Weave in the end. That's all there is to it.
Don't be afraid of the math. Just cast-on and play. It's only knitting and yarn is very forgiving.
Sunday, January 28, 2007
Capecho Progress

Do you understand why I switched needle sizes rather than changing the number of stitches to size the pentagon?

Tuesday, January 16, 2007
Capecho Pentagon Swatch
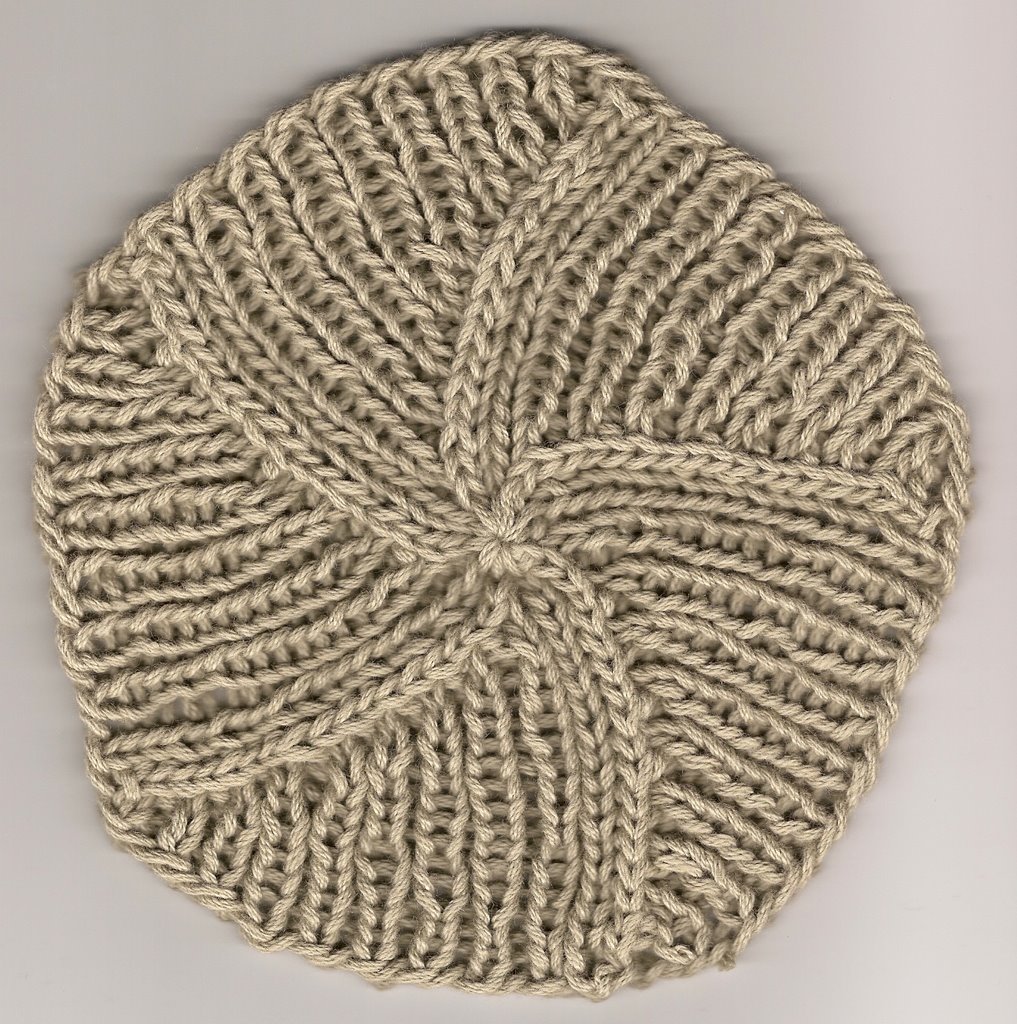
 I finished a full capecho pentagon swatch. After gentle steam blocking, it measures a hair more than 4.5" on each side and is 7" tall.
 Here is a side view of the "volcano" in the center before steam-blocking.
 In the top view of the unblocked pentagon, the starfish motif really leaps out.
The Details:
- I used Andee, a 50% Alpaca and 50% Merino blend yarn from Dharma Trading. It looks like one ~500 yd hank will be sufficient.
- I used my Plymouth bamboo modular knitting needle set, casting on with a size 9 needle and knitting in the round with size 6 (4.25 mm) needles before switching to double-pointed needles
- I had to use Plymouth needles because they make 4.25 needles; most other companies provide 4.5 mm (size 7) and 4.0 mm (size 6) needles. My first swatch with 4.5 mm didn't look right so I started over with 4.25. It is exactly what I want.
- The pattern is written for knitting back and forth and then seaming up one side. I knit the pentagon in the round.
- I cast on 5*28 stitches and started with chart row 5, omitting the k2tog and ssk.
- Finished size: s = 4.5" (side); h = 7" (height)
If you read the link about the needle sets, and want to know what happened to the neighbors with the monster trucks, read Size Matters II--but only if you are over 18. If you are under 18, don't let your parents read it.
Size Matters is hosted on my sister's blog, before she told me to get my own blog.
Click on the Pentagon label on the right to see more posts about this and other Norah Gaughan pentagon projects.
I added a new link, Sitting Knitting. Grandma Ann is an excellent photographer and chronicler of South Bay life, in addition to being a knitter and professional musician. She also threatens to post gluten-free recipes, too. I thought about putting her in under coworkers because her late husband was a coworker and mentor. But Grandma Ann and I never worked together, unless you count tie-dyeing.
That's all folks.
Wednesday, January 10, 2007
Capecho Clarification
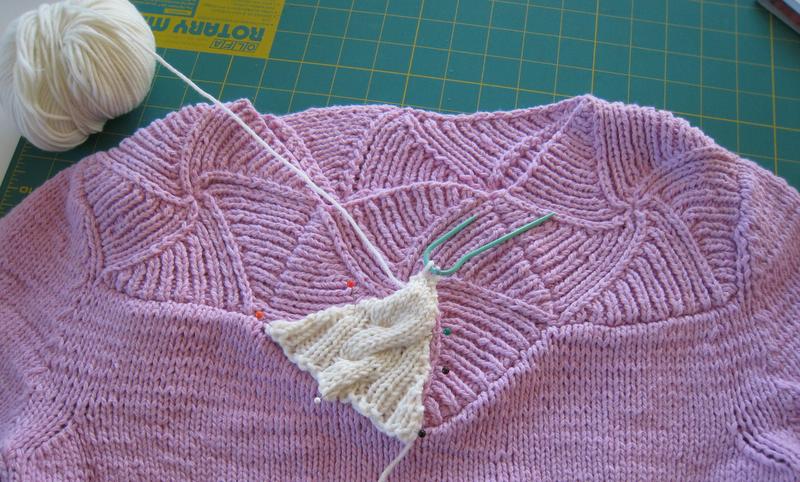
I was explaining to my sister via instant messaging (bad case of laryngitis) that I didn't intend to make the entire Capecho pictured on the cover of the winter issue of Vogue Knitting. It does tend to bulge out at unfortunate places, even on the tall, thin model. I want to make a ring of cabled pentagons for a shoulder wrap. Look at the pictures of the completed Plum Blossom yoke aka Swirled Pentagon Pullover yoke.
 When I tried on the yoke, it looked a bit small. However, when I sewed the sweater body on, the weight of the sweater pulled the yoke down gracefully to fit my shoulders (see the completed sweater at Home From Camp II).
My main conundrum is, should I make a circle of 6 or 7 pentagons for my shoulder wrap? That determines where those volcano bulges will land. Where are the most flattering positions to place them on my frame? The number of pentagons will also determine the size I need to make them. It is a good thing I wrote up notes on sizing knitted pentagons last summer.
I am also not entirely sure the seams are right for my vision. On the one hand, the seams (or edges where one picks up stitches to begin the adjacent pentagon) break up the cable pattern. A provisional cast on might be the ticket. On the other hand, seams also give it a fractured crystalline look. That construction would also be simpler to execute. Hmmm. I must knit faster and get off sleeve island! Meanwhile, I have plenty to ponder.
That's all folks.
 When I tried on the yoke, it looked a bit small. However, when I sewed the sweater body on, the weight of the sweater pulled the yoke down gracefully to fit my shoulders (see the completed sweater at Home From Camp II).
My main conundrum is, should I make a circle of 6 or 7 pentagons for my shoulder wrap? That determines where those volcano bulges will land. Where are the most flattering positions to place them on my frame? The number of pentagons will also determine the size I need to make them. It is a good thing I wrote up notes on sizing knitted pentagons last summer.
I am also not entirely sure the seams are right for my vision. On the one hand, the seams (or edges where one picks up stitches to begin the adjacent pentagon) break up the cable pattern. A provisional cast on might be the ticket. On the other hand, seams also give it a fractured crystalline look. That construction would also be simpler to execute. Hmmm. I must knit faster and get off sleeve island! Meanwhile, I have plenty to ponder.
That's all folks.
Monday, January 08, 2007
Winter Obsession
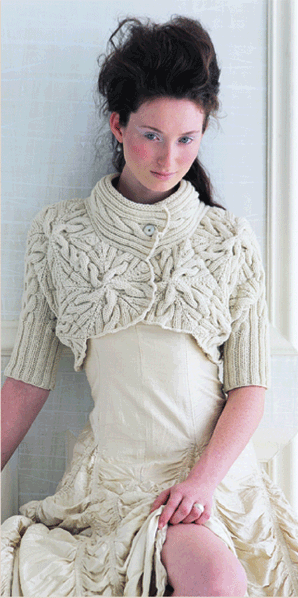 Norah Gaughan is a genius. I am as obsessed with this sweater as Mardel over at Purls and Murmers. I had planned to make a shoulder wrap with a ring of pentagons ever since I finished Plum Blossom aka the Swirled Pentagon Sweater from Knitting Nature. I was going to make it in 1x1 rib again until I saw this picture on Mardel's blog. I must make this right this minute.
 Well, I don't subscribe to Vogue Knitting and will have to wait until the issue hits the newsstands tomorrow. But that didn't stop me from poring over the pictures over at the VK magazine website and starting a swatch.
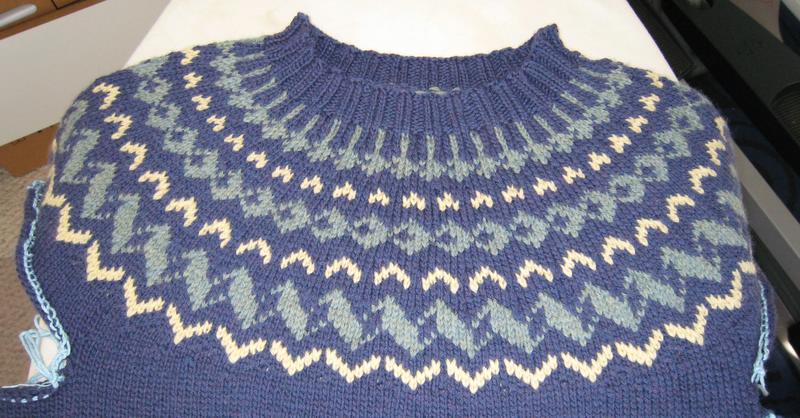
Before I get going on the capecho, I must finish the Icelandic yoke sweater. I am sooo close. I had finished 2/3 of the left sleeve last night before I tried it on. Oops, I didn't like the how drastically I had reduced the sleeve stitches in the beginning. (In order to reduce 82 sts to 48 sts, I had originally planned to make matched decreases every 4th row 10 times and then every 8th row 7 more times.) I frogged it back to the armpit and will try it again with decreases every 6th row until I get a width I like. At tonight's quilt group, I will be knitting instead of quilting.
The 17" sleeve length (including ribbing) recommended by The Best of Lopi matches my pattern sweater exactly. Because I am using a finer yarn than the pattern called for, I added a few rows of plain purple to the pattern chart to increase the yoke depth. The 10 shortrows for neckline shaping also helped.
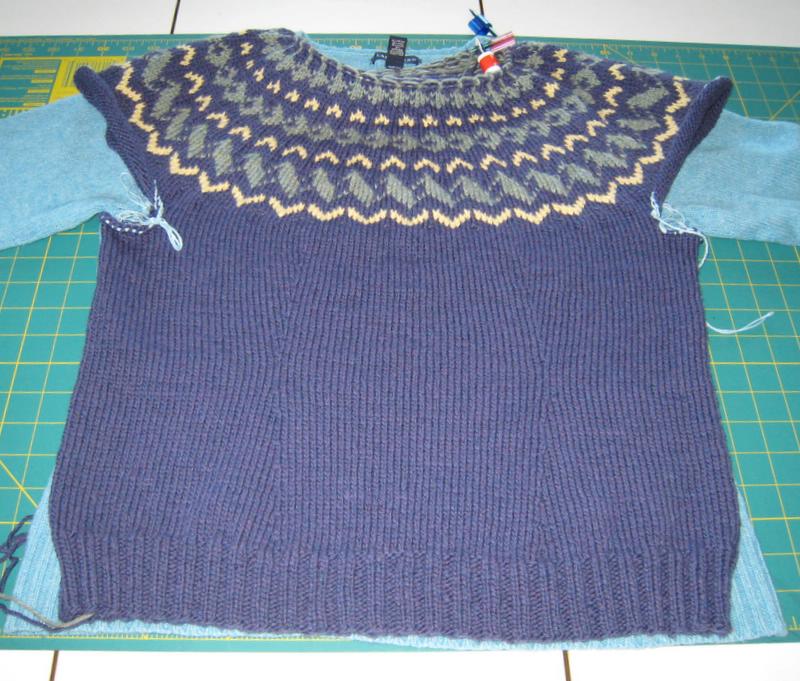 Here's what the sweater looks like now. My sister was right, the mild corrugation of the yoke disappeared with gentle steam blocking. I used 108 stitches of 2x2 rib for the neck. I probably could have used a bit less.
 That's all folks.
Saturday, July 01, 2006
Translating a pattern for knitting in the round
tcknit asked how I translated the instructions for the swirled pentagon pullover for knitting in the round. There are many sources on the web, but here is how I did it.
Usually, one would leave out the seam stitches when knitting in the round. But I left them in because, in my gauge and with my body dimensions, I needed the extra room the seam stitches would provide.
My gauge was 17 sts/4 in instead of 18. I wanted to make a 40" circumference sweater so I needed about 170 stitches all around. I used the instructions for the petite size, 82+82 = 164 stitches, which should make a sweater that was 39". I cast on 164 stitches, worked the 1x1 rib for an inch, and then switched to stockinette, adding some waist shaping along the way.
I knew that I wanted my sleeve to be slightly wider than 12", so I used the instructions for the size small (40") sweater. I hoped that I could ease the excess stitches into the stretchy yoke without any dimples.
Choosing to work with the written instructions was more than laziness. I could have customized the stitch count more to get exactly the right size. But I am fallible and know from prior experience that I can get the stitch count confused at the armhole shaping. Working with the written pattern stitch count gave me a safety net in case I lost track.
So I knit the sleeves and body pretty much exactly the way it was written, (except for waist shaping). I placed my underarm increases 2 stitches on either side of the join. I placed my waist shaping darts 20 stitches on either side of the center front and back. I used markers for the center front and back, sides and waist darts for the body and at the join for the sleeve.
When I got to the underarm shaping area, I bound off 3 stitches on either side of the sleeve join and the body's "side seams". Then I joined all 3 pieces and placed markers where the seams would have been (round 1). Then I knitted one row even which is equivalent to BO 3 at the beginning of the next 2 rows.
Where it said BO 2 at the beginning of the next 2 rows, I decreased one stitch at each end of the section.
2 stitches from each "seam", I made decorative decreases, pairing the S1, K1, PSSO decrease and the KSP decrease described here.
On round 9, I divided for the center front and back Vs and knitted back and forth. Something I did not do, but should have done, was put the body join at a center front or back. That will make the conversion to the round easier. I placed the join at a side seam and the body and the sleeve row counts were offset by one for a little while. Not easy to keep track of.
I bound off the stitches at the top of the sleeve cap and the yoke as described in the pattern. I avoided the stair step by slipping the first stitch as described here (and in many other places).
Here is the armpit area of the sweater after I sewed the bound off edges together.

A view of the decorative decreases. It might have looked better if I made the decreases only 1 stitch in from the "seams". Oh, well.

I used only one strand of the pink yarn when sewing the yoke to the sweater. Notice how the sweater is "rowed out" at the top? It is more obvious from the inside.
 That's why I knit the sweater in the round. When knitting back and forth with inelastic cotton yarn, I simply cannot make my rows even. The sample above was knit using combined knitting. With normal western purling, the difference would have been even greater.
keywords: knitting, sizing, knitting nature, norah gaughan, swirled pentagon pullover, plum blossom
Usually, one would leave out the seam stitches when knitting in the round. But I left them in because, in my gauge and with my body dimensions, I needed the extra room the seam stitches would provide.
My gauge was 17 sts/4 in instead of 18. I wanted to make a 40" circumference sweater so I needed about 170 stitches all around. I used the instructions for the petite size, 82+82 = 164 stitches, which should make a sweater that was 39". I cast on 164 stitches, worked the 1x1 rib for an inch, and then switched to stockinette, adding some waist shaping along the way.
I knew that I wanted my sleeve to be slightly wider than 12", so I used the instructions for the size small (40") sweater. I hoped that I could ease the excess stitches into the stretchy yoke without any dimples.
Choosing to work with the written instructions was more than laziness. I could have customized the stitch count more to get exactly the right size. But I am fallible and know from prior experience that I can get the stitch count confused at the armhole shaping. Working with the written pattern stitch count gave me a safety net in case I lost track.
So I knit the sleeves and body pretty much exactly the way it was written, (except for waist shaping). I placed my underarm increases 2 stitches on either side of the join. I placed my waist shaping darts 20 stitches on either side of the center front and back. I used markers for the center front and back, sides and waist darts for the body and at the join for the sleeve.
When I got to the underarm shaping area, I bound off 3 stitches on either side of the sleeve join and the body's "side seams". Then I joined all 3 pieces and placed markers where the seams would have been (round 1). Then I knitted one row even which is equivalent to BO 3 at the beginning of the next 2 rows.
Where it said BO 2 at the beginning of the next 2 rows, I decreased one stitch at each end of the section.
2 stitches from each "seam", I made decorative decreases, pairing the S1, K1, PSSO decrease and the KSP decrease described here.
On round 9, I divided for the center front and back Vs and knitted back and forth. Something I did not do, but should have done, was put the body join at a center front or back. That will make the conversion to the round easier. I placed the join at a side seam and the body and the sleeve row counts were offset by one for a little while. Not easy to keep track of.
I bound off the stitches at the top of the sleeve cap and the yoke as described in the pattern. I avoided the stair step by slipping the first stitch as described here (and in many other places).
Here is the armpit area of the sweater after I sewed the bound off edges together.

A view of the decorative decreases. It might have looked better if I made the decreases only 1 stitch in from the "seams". Oh, well.
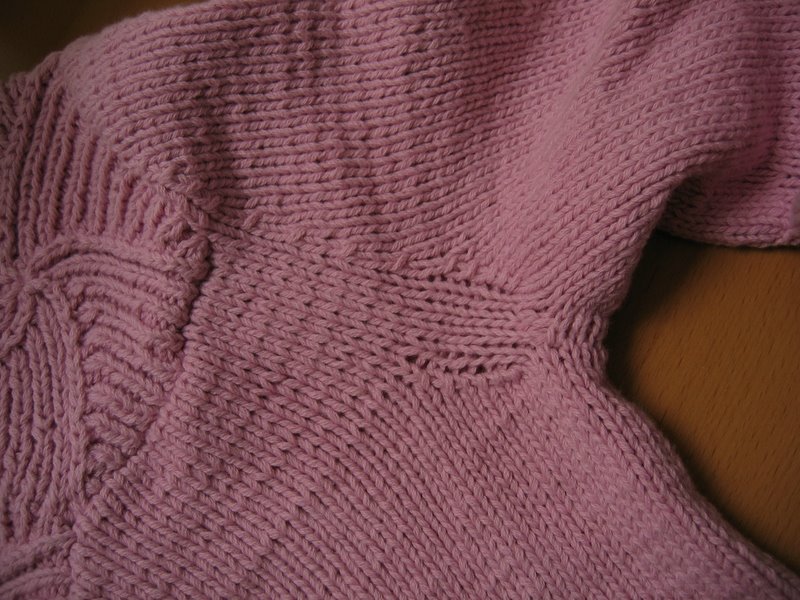
I used only one strand of the pink yarn when sewing the yoke to the sweater. Notice how the sweater is "rowed out" at the top? It is more obvious from the inside.
 That's why I knit the sweater in the round. When knitting back and forth with inelastic cotton yarn, I simply cannot make my rows even. The sample above was knit using combined knitting. With normal western purling, the difference would have been even greater.
keywords: knitting, sizing, knitting nature, norah gaughan, swirled pentagon pullover, plum blossom
Sizing Knitted Pentagons
I thought some people may be interested in how I sized the pentagons in plum blossom. I used a yarn with a slightly different gauge than called for in the pattern and had to make several changes. I started by swatching in both stockinette and 1x1 rib. Then I tried to find the number of stitches to cast on for a pentagon with the correct height (~6.5 inches for my size). Unfortunately, the schematic on page 48 only gave the height of the pentagon and not the length of each side.
I did some websurfing and found that the ratio of a pentagon's chord and it's side is the golden ratio. There are many proofs on the web. Here is one. But the height of a pentagon (which is given in the pattern schematic) is shorter than the chord. (A chord is a line connecting any two non-adjacent vertices of a pentagon.) I worked out a formula for calculating the length of a pentagon side as a function of the height using trigonometry. But, I can't find my calculations and this solution was much more elegant than mine.
If s is the length of a pentagon side and x is it's height, then
I wanted a 40" chest pullover which meant I needed a 6.5 inch high pentagon. That translates into a pentagon 4.25 inches long on each side. My swatch suggested that 20 stitches of 1x1 rib using my yarn and size 4 needles would work. I made a test pentagon, washed and dried it, and then measured it. It was just shy of 6.5 inches because the sides of the knitted pentagon are somewhat curved, not straight. Nevertheless, I plowed ahead with the rest of the pentagon yoke.
When I tried on the completed pentagon yoke, it was slightly too tight. I guessed that, once completed, the weight of the sweater body and sleeves would stretch out the yoke. That turned out to be correct. Whew!
Suppose you want to knit a pentagon using another stitch? The ratio of the sides to the height remains the same, whether you make the pentagons in stockinette, rib or garter stitch. The decrease ratio may need to be adjusted for the row gauge. Stockinette and rib have the same row gauge so decreasing one stitch per round (or two stiches every other round) gives pentagons with a slight volcano effect (protrusion in the middle) which blocks out flat. The book's instructions for the garter stitch pentagons in the mosaic pullover also decrease 2 stitches every other round and the pentagons appear flatter.
Still skeptical? Grumperina wanted to make a size petite sweater and used stockinette for her pentagons. She used 15 stitches on each side. If she achieved a perfect 4.5 sts/in gauge, then her pentagon had a side of 3.33 inches and a height of 5.13 inches which is pretty much dead on to the 5.25 height given in the schematic.
keywords: knitting, geometry, knitting nature, norah gaughan, swirled pentagon pullover, knitted pentagon
I did some websurfing and found that the ratio of a pentagon's chord and it's side is the golden ratio. There are many proofs on the web. Here is one. But the height of a pentagon (which is given in the pattern schematic) is shorter than the chord. (A chord is a line connecting any two non-adjacent vertices of a pentagon.) I worked out a formula for calculating the length of a pentagon side as a function of the height using trigonometry. But, I can't find my calculations and this solution was much more elegant than mine.
If s is the length of a pentagon side and x is it's height, then
s = 0.65 x
x = 1.54 s
Plugging in the numbers from the schematics on page 52 and 64 ,which give the dimensions of both the pentagon heights and sides, showed that the formula is correct.x = 1.54 s
I wanted a 40" chest pullover which meant I needed a 6.5 inch high pentagon. That translates into a pentagon 4.25 inches long on each side. My swatch suggested that 20 stitches of 1x1 rib using my yarn and size 4 needles would work. I made a test pentagon, washed and dried it, and then measured it. It was just shy of 6.5 inches because the sides of the knitted pentagon are somewhat curved, not straight. Nevertheless, I plowed ahead with the rest of the pentagon yoke.
When I tried on the completed pentagon yoke, it was slightly too tight. I guessed that, once completed, the weight of the sweater body and sleeves would stretch out the yoke. That turned out to be correct. Whew!
Suppose you want to knit a pentagon using another stitch? The ratio of the sides to the height remains the same, whether you make the pentagons in stockinette, rib or garter stitch. The decrease ratio may need to be adjusted for the row gauge. Stockinette and rib have the same row gauge so decreasing one stitch per round (or two stiches every other round) gives pentagons with a slight volcano effect (protrusion in the middle) which blocks out flat. The book's instructions for the garter stitch pentagons in the mosaic pullover also decrease 2 stitches every other round and the pentagons appear flatter.
Still skeptical? Grumperina wanted to make a size petite sweater and used stockinette for her pentagons. She used 15 stitches on each side. If she achieved a perfect 4.5 sts/in gauge, then her pentagon had a side of 3.33 inches and a height of 5.13 inches which is pretty much dead on to the 5.25 height given in the schematic.
keywords: knitting, geometry, knitting nature, norah gaughan, swirled pentagon pullover, knitted pentagon
Monday, June 26, 2006
Home from Camp, II
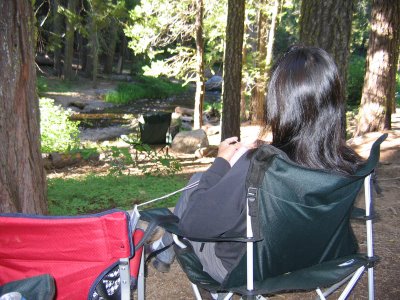
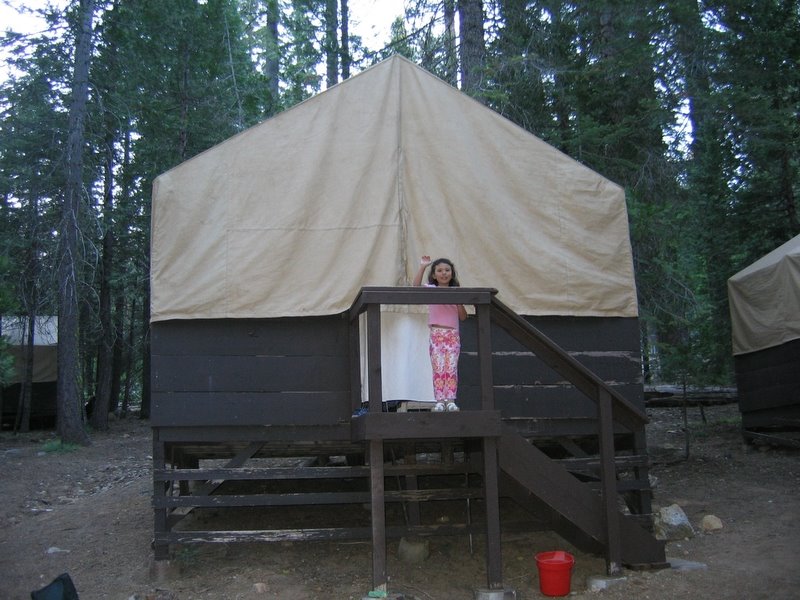
This was our home away from home the past week.

It seemed like the laundry would never end. I also visited 4 doctors today for followup care for my illnesses which flared up last week. It appears that my medical disability period will need to be extended.
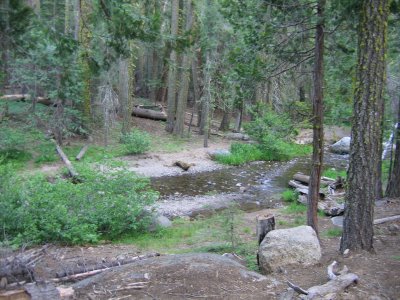
Before I lost vision in my left eye, this was the view that awaited me every morning as I stepped out of the cabin. Not a bad place to sit and knit, non?
As mountain biking and hiking were out of the question, I had plenty of time to finish the swirled pentagon pullover sweater which I have renamed (drumroll) Plum Blossom. Mark said that this sweater would be a really good seller at the pentagon gift shop. But that pentagon has linear forms. These are curvy and reminded me of fruit blossoms. The color is just right for plum blossoms.

Here is a closeup of the yoke

and this is the back, showing the waist shaping.

I did not find any additional errors in the pattern . It was really a fun and challenging design. Like Grumperina, I thought the sweater came together really well.
I tweaked the pattern slightly.
 keywords: knitting nature, swirled pentagon pullover, lair of the golden bear, Norah Gaughan
Links: see the completed yoke, before sewing to the sweater body.
It seemed like the laundry would never end. I also visited 4 doctors today for followup care for my illnesses which flared up last week. It appears that my medical disability period will need to be extended.
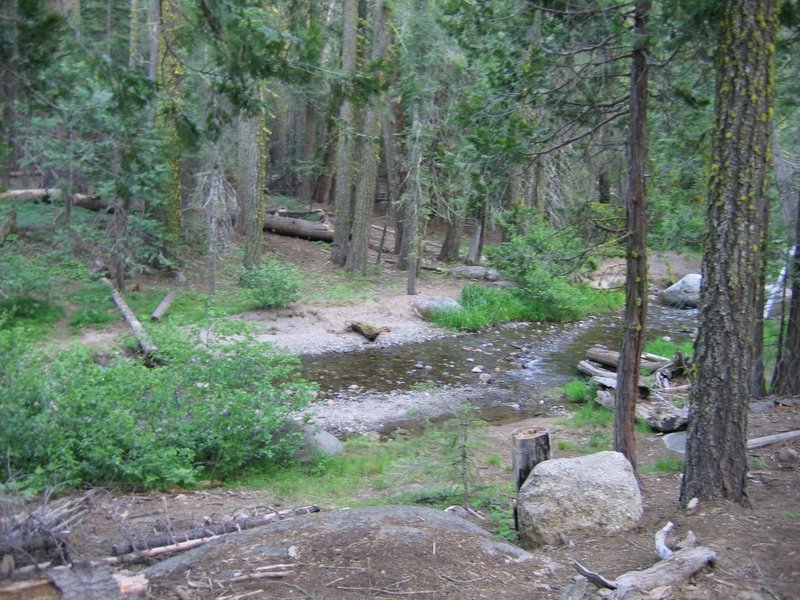
Before I lost vision in my left eye, this was the view that awaited me every morning as I stepped out of the cabin. Not a bad place to sit and knit, non?
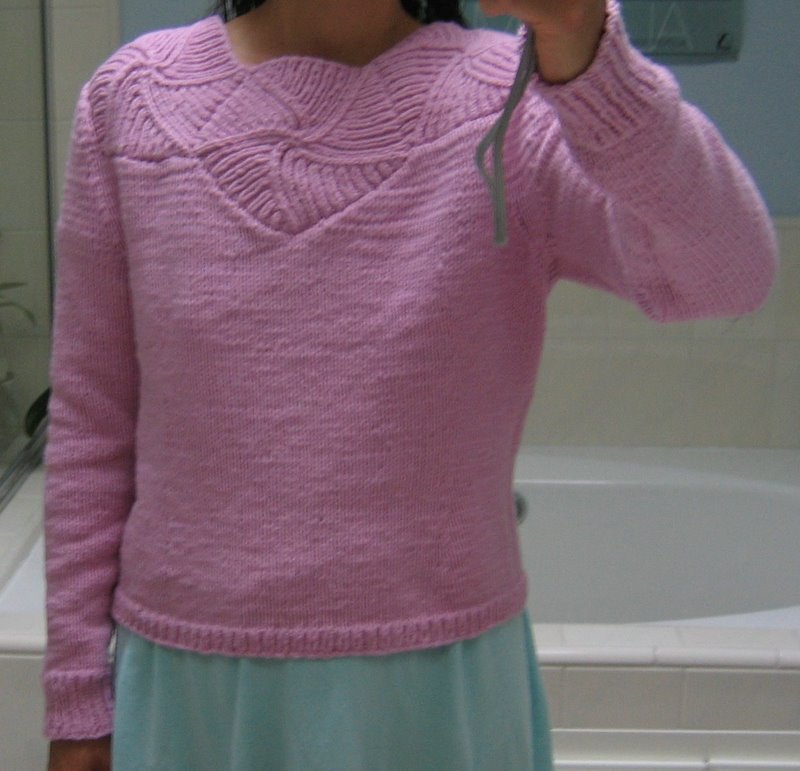
As mountain biking and hiking were out of the question, I had plenty of time to finish the swirled pentagon pullover sweater which I have renamed (drumroll) Plum Blossom. Mark said that this sweater would be a really good seller at the pentagon gift shop. But that pentagon has linear forms. These are curvy and reminded me of fruit blossoms. The color is just right for plum blossoms.
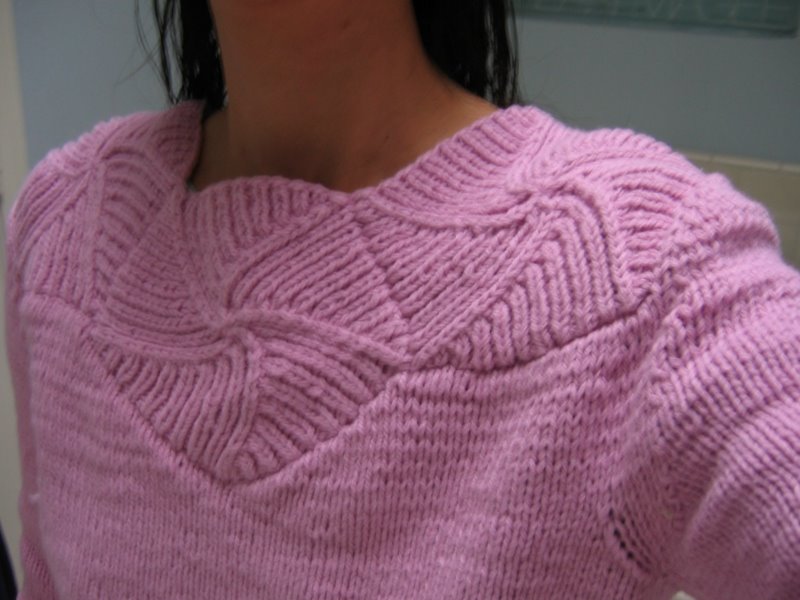
Here is a closeup of the yoke
and this is the back, showing the waist shaping.

I did not find any additional errors in the pattern . It was really a fun and challenging design. Like Grumperina, I thought the sweater came together really well.
I tweaked the pattern slightly.
- I used a different yarn which yielded a looser gauge. I compensated by following knitting instructions for a petite size body and yoke and a small size sleeve.
- I added waist shaping, making 4 decreases/increases every 6 rows 5 times.
- This one is a biggie. I translated the instructions for knitting the sweater in the round. I joined the sleeves and the body at the underarm as in a traditional yoked sweater. After 8 rows, I divided up the knitting in 2 parts, left and right side. After binding off the last of the body stitches (row 26 after joining), I finished the sleeve (39 rows after joining).
- I made the decreases decorative, like the ones I learned in making this cardigan.
- If I were to make the sweater again, I would have made the sleeve cap about 2 rows shorter. Your row gauge may be different than mine, but I think the fit of my sweater would have been improved without the very slight wrinkle at the sleeve cap.
- I omitted the turtleneck.
- I did not fasten off the half pentagon at the back neck until there were 2 stitches in each section. (The pattern said 6 stitches.)
 keywords: knitting nature, swirled pentagon pullover, lair of the golden bear, Norah Gaughan
Links: see the completed yoke, before sewing to the sweater body.
Wednesday, June 07, 2006
Making Progress
Making the yoke of the sweater was fiddly, but never boring. Making the body of the sweater is simple, but boring. SNORE. The body is 6" long and I am done decreasing for the waist shaping. Another 1.5" and I can start increasing. I intend to shorten the sweater and shape for the armholes at 14". At least it is good movie watching knitting.
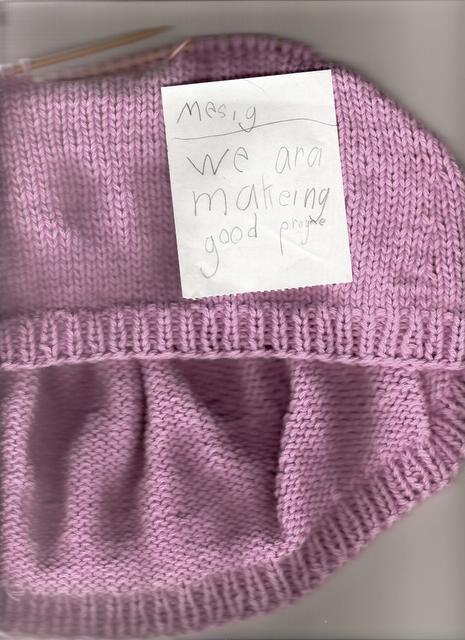
I found this note from Iris at the bottom of the staircase. I think that she dropped that note from upstairs to tell her dad that we were making good progress on sorting and cleaning out our files and then transferring them into our new, sturdier file cabinets. It was a big, two-day job. Iris was surprisingly helpful. She loved feeding the unneeded papers into the shredder.
Some people have remarked upon her creative spelling. I have been known to mark down lab reports for bad spelling and grammer, even as the students protested that spelling shouldn't matter in a science class. However, those were college students. Iris is 5.5 years old and I will not be correcting her spelling for another couple of years. Right now, I treasure every little note she leaves me.
keywords: Knitting Nature, Norah Gaughan, Swirled Pentagon Pullover, Iris
Saturday, June 03, 2006
The Completed Yoke
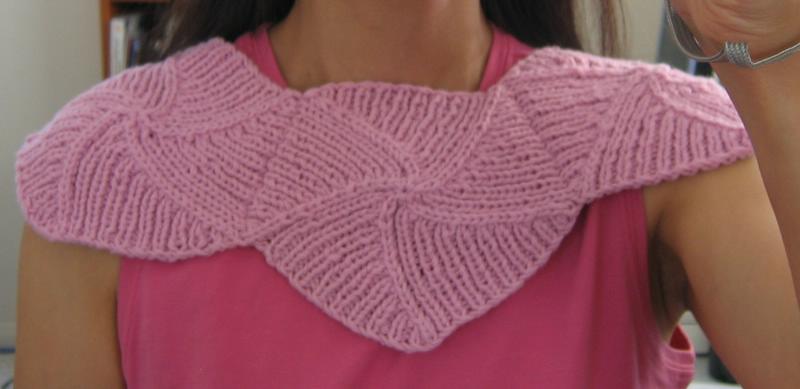
I joined the Knitting Nature Knit-Along. I enjoy watching others' progress. But I noticed that everyone is struggling with typos in the patterns. It does not appear that there are any entirely correct patterns in the entire book.
I found another typo in the instructions for the final half pentagon. It said to continue in 2x2 rib when it should have said 1x1 rib.
Here is the back of the yoke, with the half pentagon filling the center back gap.
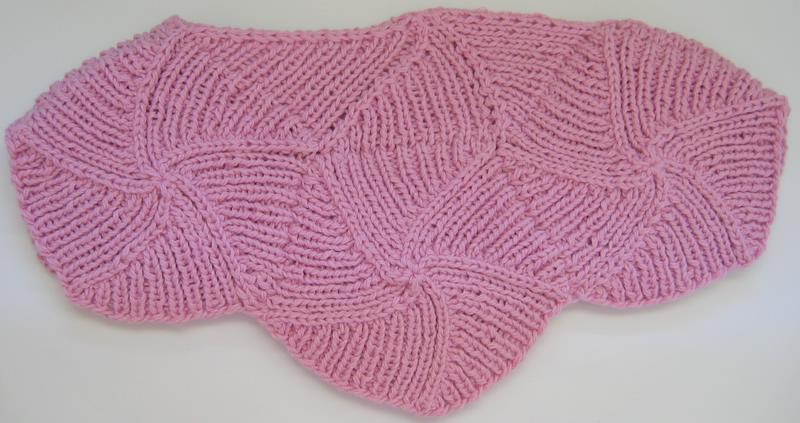
The instructions said to fasten off when there were 6 or 7 stitches on each DP needle. I waited until there were 2 or 3 stitches on each needle (and I used a single circular needle with markers instead). I plan to leave the yoke as is, without adding the 2x2 rib portion. I live in LA after all and we don't have turtleneck weather very often.
A gratuitous shot of the front of the yoke.
The yoke came together fairly well. There are very slight volcanos at the centers of the pentagons. (Volcano is a technical term in quilting when your lone star doesn't come out quite flat.) Hopefully, they will disappear when the rest of the sweater is attached.
If I had it to do over again, I would have started the ribbing k1,p1,k1...p1. Then, I would have decreased at the beginning of each section with a ssk instead of decreasing at the end of the sections with k2tog. I am working with 100% cotton yarn and I find that ssk stretches the yarn out less than k2tog. Hopefully, this will be less noticeable after the first time I wash the sweater. The pentagons would swirl in the opposite direction but the overall effect should be the same as long as they all swirled in the same direction.
keywords: Knitting Nature, Norah Gaughan, Swirled Pentagon Pullover, pattern errors.
links: see the completed sweater at Home From Camp II
Thursday, June 01, 2006
Pink Swirling Pentagons
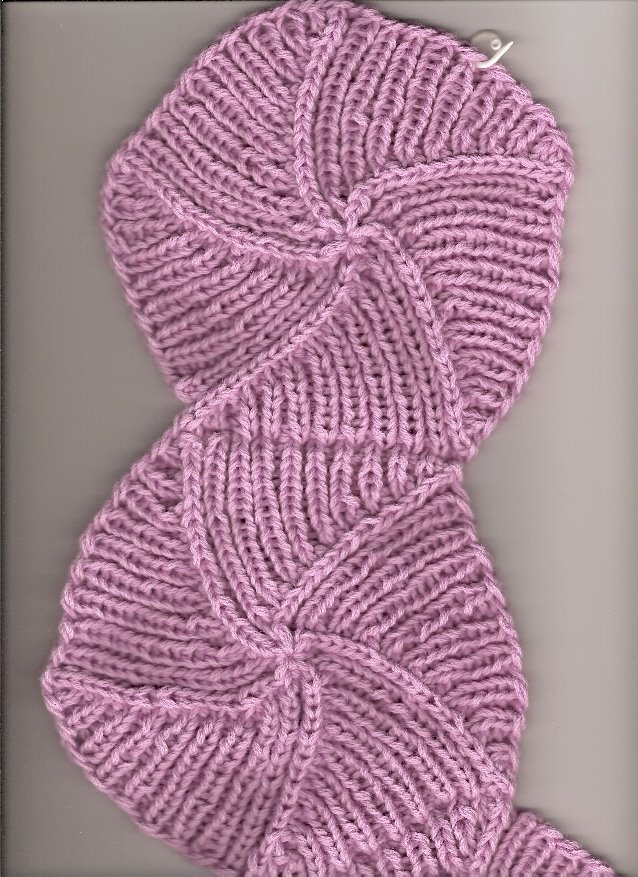
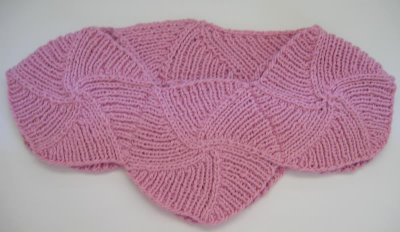
[Only 2 of the 4 pentagons completed so far fit on my flatbed scanner.]
I became obsessed with the swirly pentagons in the bookstore and started a swatch right away. You can read about my gauge trials ad nauseum here. Fortunately, after some sleep, my gauge problem corrected itself. I had miscounted the number of stitches.
Anyhow, the doubled pink yarn gives me 17 sts/4" and 20 sts per side of the pentagon gives me the right size pentagon for a size S. Because my gauge is slightly bigger than the yarn used in the book, I will use the directions for XS which will (hopefully) make a Small sweater.
Since I fell in love with the pentagons, I am knitting them first. (It's also because I saw Grumperina's pictures. The thought of turning the whole sweater round and round and round just made me feel tired.) After I knit the yoke, I plan to knit the body and sleeves in the round from the bottom, join them at the underarm, and continue knitting until I get to the yoke. I haven't decided yet whether to graft the live stitches to the cast on edges of the yoke or to bind off the body and sleeve stitches. Anybody have thoughts on this approach?
Knitting 1x1 rib in the cabled cotton yarn is hard on my hands and wrists. I can make about 2 pentagons a day before it starts to hurt. Maybe I will start on a sleeve and finish the rest of the pentagons another day.
Like Christine, I had difficulty figuring out the best way to knit these units. I tried magic loop with one circular (click for result) , 6 double pointed needles and finally settled on knitting with two cirulars. As I worked inwards, the dangling ends of the circulars became more and more awkward. But they still beat the DPNs falling out everywhere, dropping stitches. Magic loop worked well on the outer part of the pentagon, but became unwieldy towards the middle.
keywords: Knitting Nature, Norah Gaughan, Swirled Pentagon Pullover
Monday, May 29, 2006
Swirling Pentagon
I bought Knitting Nature last Friday and cast on for a swirling pentagon right away. Upon closer inspection at home, I found that this book is rife with typos. For example, on page 47, it says to use size 8 needles to achieve a 18x25 gauge in stockinette for the body, a size 6 needle for the 1x1 rib at the cuffs and hem, and a size 9 needle for the 1x1 rib in the swirling pentagons. Look at the volcano on Grumperina's initial attempt when she followed the instructions. I agree with her that the size 9 should have read size 6. Her finished sweater looks fantastic.
I made test swatches with some 98 cent yarn from Marukai Marketplace. The wrapper says 100% peruvian cotton made in Japan. I got 18 sts per 4" in stockinette with size 6 needles and a pentagon with 20 sts and size 5 needles measured 6 1/4" tall. It looked like I could make the 40" size (small) with this yarn if I cast on 22 sts per side for the pentagon. I went back to the store for more yarn.
They didn't have the same color, but I bought 14 balls of a lovely orchid pink color instead. I was about halfway through the pentagon when I realized that the pink yarn is considerably thinner than the taupe yarn. I tried doubling the yarn and the gauge came to 16 sts per 4". This sweater is not in my immediate future.
I was also interested in making the Mosaic Shrug on page 64. The instructions don't make any sense. If you want to make a pentagon, why would you cast on 80 stitches onto 4 needles and then work the decrease rows? The instructions for the decrease rows say to [k2tog, k to 2 sts before end of needle, ssk] 5 times!
Does anyone know if there is an errata for the book posted on the web yet? The designs are so lovely. I wish they had taken a little bit more time to copy edit the book.
Subscribe to:
Posts (Atom)